Game creation · Practical guide
AI Game Modding: From Concept Art to a Playable Mod
The lantern looks great in the concept image. Will it still look right in an inventory slot—and stay in the character’s hand when they walk? Those are the questions to answer before adding more features.
By AI Image to Video Editorial · · 7 min read
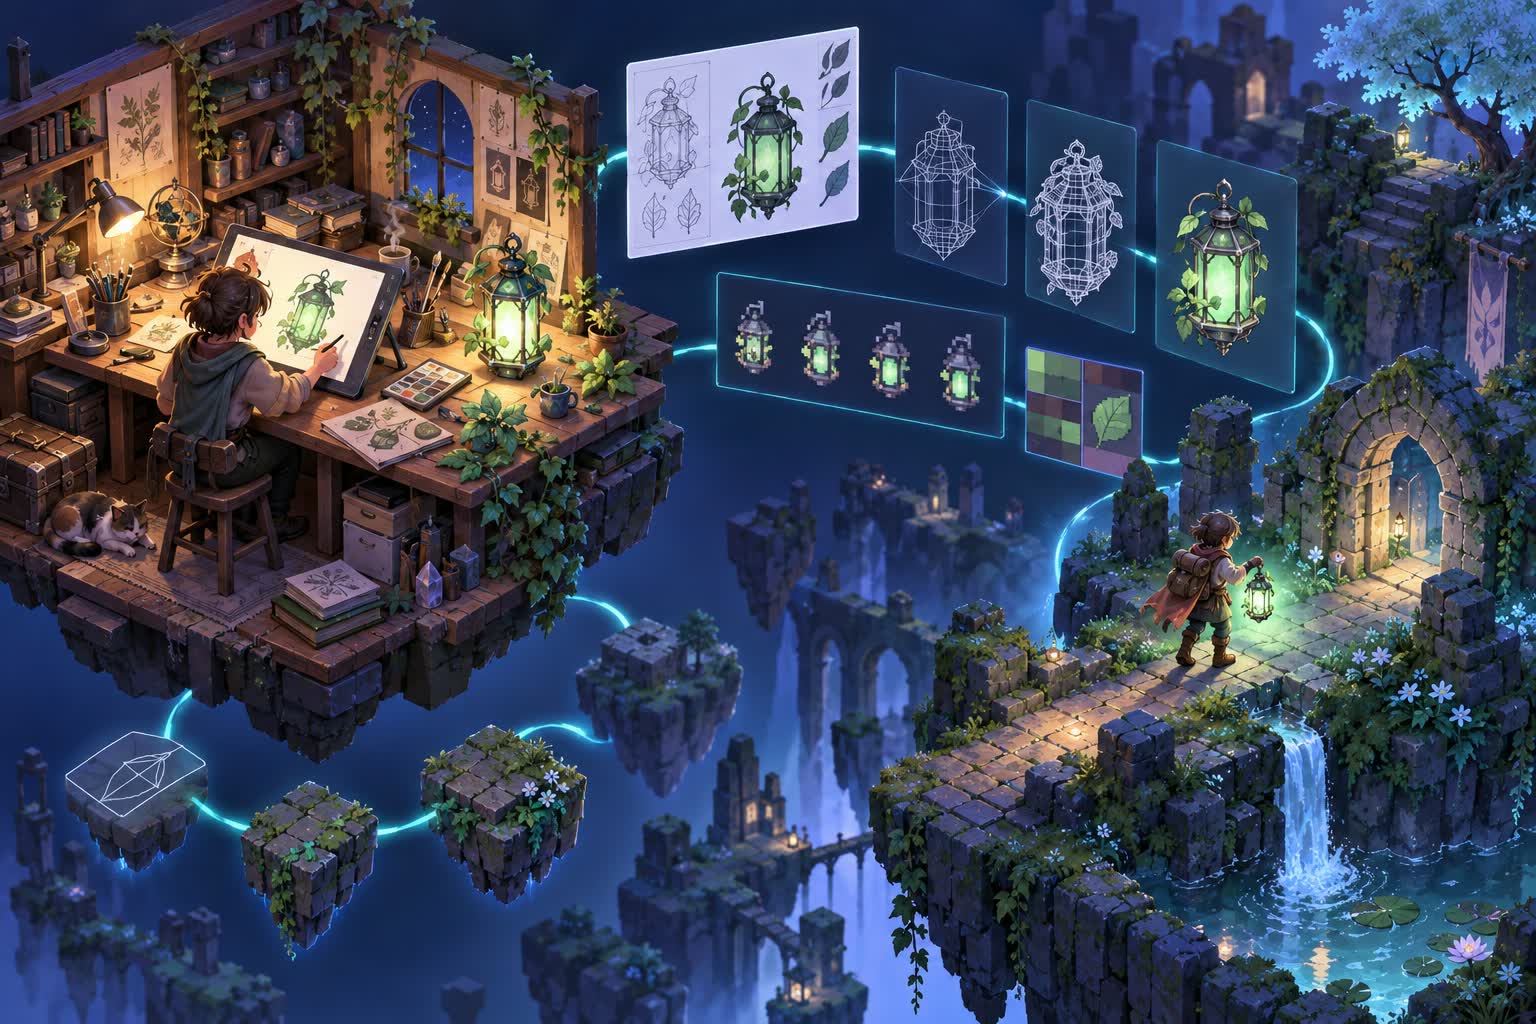
With AI game modding, you can ask a coding agent to find the item API while you work on a sprite. Once the item loads, you can check how the code and artwork fit together in the game. The awkward part is usually the fit: a handle sits a few pixels too high, a glow hides the outline, or an item disappears after reloading. We’ll use an imagined botanical lantern to walk through those decisions. The example is a design exercise; we haven’t built or tested this mod.
1. Start with one item
For the first version, the lantern needs to appear in the inventory, equip correctly and remain there after saving and reopening a test world. Leave the crafting recipe, moving leaves and custom lighting for later. If five new systems fail at once, you’ll spend more time guessing which one broke than fixing it.
Write down the game version, loader version and operating system before asking the agent for code. Include any other enabled mods. Then find the community’s usual way of adding an item. Knowing that a game uses Unity or Unreal won’t tell you which hooks it exposes, or whether a loader still works after the latest patch.
Use a separate profile or disposable world, and copy the save folder somewhere you can restore it from. The example here is for offline single-player play in a game you own. Check the game’s modding rules before installing a loader; protected online sessions are outside this walkthrough.
2. What Universal Modder helps with
Universal Modder bundles instructions for coding agents, the um toolkit and notes from earlier modding sessions. The repository documents tools for locating games, backing up saves, preparing artwork and capturing footage. These can save setup work when the target game has a usable modding route.
Ask the agent to find an existing note for your game and compare its version with your installation. A note written before a major update may still explain the file structure, even if its code needs changing. Use the repository’s current installation instructions and check command help before letting a tool alter game files.
For Terraria, tModLoader’s ModItem properties and hooks reference describes item properties, recipes and use hooks. Give the agent the reference that matches your loader version. Ask it to point to the method behind each proposed action so you can check the code against documentation.
3. Set the artwork specifications first
Open a working item from a permitted sample project before generating the lantern. Note its canvas dimensions, file format, viewpoint and folder path. Check where the character’s hand meets the handle. You may need two exports: a detailed inventory icon and a simpler sprite that reads clearly beside the character.
A brief you can give the agent
I want to add one botanical lantern to an offline test world in [game]. Find the installed game and loader versions, the item API, texture dimensions and save folder. Link the relevant documentation. For the first version, I only need to acquire, equip and unequip it. List the files you would change and how I can remove the mod afterward. Flag anything you couldn’t verify.
Add a few checks in plain language: the handle meets the hand, the sprite faces the right way when turning, and the item remains after reloading. “Make it polished” leaves too much room for interpretation. These checks tell you when the first version is ready for another feature.
4. Turn concept art into game assets
For the lantern artwork, ask for a compact silhouette, a visible handle and a small palette that fits the game. Avoid tiny vines and elaborate reflections on the first pass. View the result at its intended size before choosing a version: details that look lovely on a large canvas can merge into a green smudge in the inventory.
Clean up the image in an editor, fit it to the required canvas and align the attachment point. For pixel art, inspect individual pixels after resizing; a reduced illustration often has soft edges that clash with the rest of the scene. Put the export over light and dark backgrounds. A pale fringe around the leaves may be almost invisible on white and obvious in a cave.
If the game uses Godot, its Godot image-import documentation covers compression and mipmaps. Check the target project’s settings rather than copying settings from another engine. A texture that looks sharp in your editor may look different after import, especially at a distance or under a different filter.
| Check | Record before export | Failure to look for |
|---|---|---|
| Geometry | Canvas size, viewpoint, pivot and silhouette | The object floats, clips into the hand or changes scale |
| Texture | Alpha edges, palette, filtering and compression | A bright halo, blurry pixels or muddy colors |
| Animation | Frame count, ordering, timing and loop seam | A visible jump, flicker or sliding feet |
| Behavior | Spawn rule, use action, persistence and removal | The item exists but cannot be used or safely removed |
5. Check the mod in-game
Launch the game without the new mod once and save the loader log. Then enable the lantern on its own. Acquire it, equip it, walk in both directions, change scenes, unequip it, save and reopen. Check it at the zoom you normally play at. A close-up screenshot won’t reveal whether the item is readable during play.
Next, disable the mod and try reopening that disposable save. Some games handle missing modded items; others may need cleanup before removal. Record the result and any steps needed. Keep your original save out of this test.
When something fails, give the agent the steps and the log excerpt, not just “it’s broken.” For example: “Equip the lantern, turn left, then jump. The handle moves above the hand; facing right looks correct.” That points toward an alignment or mirroring problem. Fix that before changing the palette or generating a replacement image.
6. Record gameplay and animate the concept
A short gameplay clip can show the lantern being equipped, carried and put away. Leave that sequence uncut so viewers can follow what happens. Put the tested game and loader versions in the description, and choose a scene where the item is easy to see.
You can also use the concept image for an animated opening shot: a pulse of light inside the lantern, perhaps with a little drifting dust. Label that shot “AI concept animation,” then cut to gameplay. It gives the artwork a moment on screen without suggesting that the generated motion comes from the game.
Concept animation prompt
Locked camera on the botanical lantern in the supplied concept image. The green light gently brightens and softens once. A few dust particles drift past. Keep the handle, silhouette, materials and background stable. No added objects, no camera orbit, no transformation.
Watch the handle and leaf edges as the clip plays. If they bend or change shape, reduce the motion and try again. A locked camera keeps the request simple; an orbit would require the model to invent the back of the lantern. A still image is fine if the animation keeps distracting from the design.
Our image-to-video motion prompt guide and prompt library offer other motions to try. For this shot, start with the shortest duration available in your selected model and match the aspect ratio to the gameplay footage.
7. Prepare the download
Open the release folder as if you were downloading it for the first time. It should contain your mod, the assets you have permission to distribute and installation instructions. Remove private saves, API keys, retail game files and decompiled code. Keep the editable artwork in your own project so you can reproduce the export later.
Write down the tested versions, dependencies, installation path and removal steps. Add known problems where users will see them before installing. Credit the artwork and tools, including AI generation where used. The reader should be able to tell which files to copy and what to expect on the next launch.
Be specific about unfinished checks. “Tested equipping and reloading; removal from an existing save is untested” tells a reader far more than “use at your own risk.” It also gives you a clear next task.
Common questions about AI game modding
Can AI-generated video become a sprite animation?
You can extract frames, but check whether the object keeps the same proportions and attachment point throughout. You’ll still need to align the frames, set timing and export the sheet format the game expects. For a small lantern sprite, editing a few frames by hand may be less work than repairing a generated sequence.
Where does image-to-video fit in this workflow?
Use it to animate artwork for a mod page or video introduction. Keep code, loader installation and game testing in your modding tools. Uploading a concept image here produces a video; it doesn’t add the item to a game.
Do I need Universal Modder for a small mod?
No. If your game has a well-documented SDK and a small sample mod, start there. Universal Modder may help when you need to gather information across tools or repeat asset-processing steps. Choose it based on the work you have, rather than adding it to every project.
Sources
Documentation reviewed October 10, 2026. Check the current repository instructions and the API reference for your installed version before following an example.
- Hugging Face community guide to Universal Modder — an introduction to the toolkit.
- Universal Modder repository — installation, commands and game-specific notes.
- tModLoader ModItem reference — item properties and hooks for Terraria mods.
- Godot image import documentation — compression, mipmaps and import settings.
Try a lantern concept shot
Have a concept image ready? Upload artwork you have permission to use, then try the light-pulse prompt above.
Animate your artwork